
ACRYLIC NAILS FOR BEGINNERS
Acrylic Nails for Beginners: Complete Step-by-Step Guide 2025
Are you ready to learn how to do acrylic nails like a professional? Whether you’re aspiring to become a nail technician or simply want to create salon-quality nails at home, this comprehensive guide will walk you through everything you need to know about acrylic nails for beginners.
Acrylic nails remain one of the most popular nail enhancement techniques, offering durability, versatility, and stunning results. With the right supplies, proper technique, and a bit of practice, you’ll be creating beautiful acrylic nails in no time.
This beginner-friendly tutorial covers everything from choosing supplies to mastering application, avoiding common mistakes, and maintaining your gorgeous acrylic nails.
Table of Contents
- What Are Acrylic Nails?
- Essential Supplies You’ll Need
- Preparing Your Natural Nails
- Step-by-Step Application Process
- Shaping and Finishing
- Common Mistakes to Avoid
- Maintenance and Care
- Learning Timeline
- Frequently Asked Questions
- Recommended Products
What Are Acrylic Nails?
Acrylic nails are artificial nail enhancements created by combining a liquid monomer and powder polymer. When these two components mix, they form a moldable bead that hardens into a durable protective layer over your natural nails.
How Acrylic Nails for beginners
The science behind acrylics is simple yet fascinating. When you dip your brush into the liquid monomer and then into the powder polymer, a chemical reaction called polymerization occurs. This creates a workable bead that you can shape and sculpt on the nail before it hardens completely.
The Process:
- Liquid monomer + powder polymer = moldable bead
- Bead is applied and shaped on nail
- Chemical reaction causes hardening (2-3 minutes)
- Result: Strong, durable nail enhancement
Why Choose acrylic nails for beginners?
Durability Acrylic nails can last 2-3 weeks with proper care, making them perfect for those who want long-lasting manicures without constant touch-ups.
Strength If you have weak, brittle, or thin natural nails, acrylics provide a protective shield that prevents breaking and allows your natural nails to grow underneath.
Length Acrylics let you achieve significant length that natural nails simply can’t. Whether you want medium length or dramatic stilettos, acrylics make it possible.
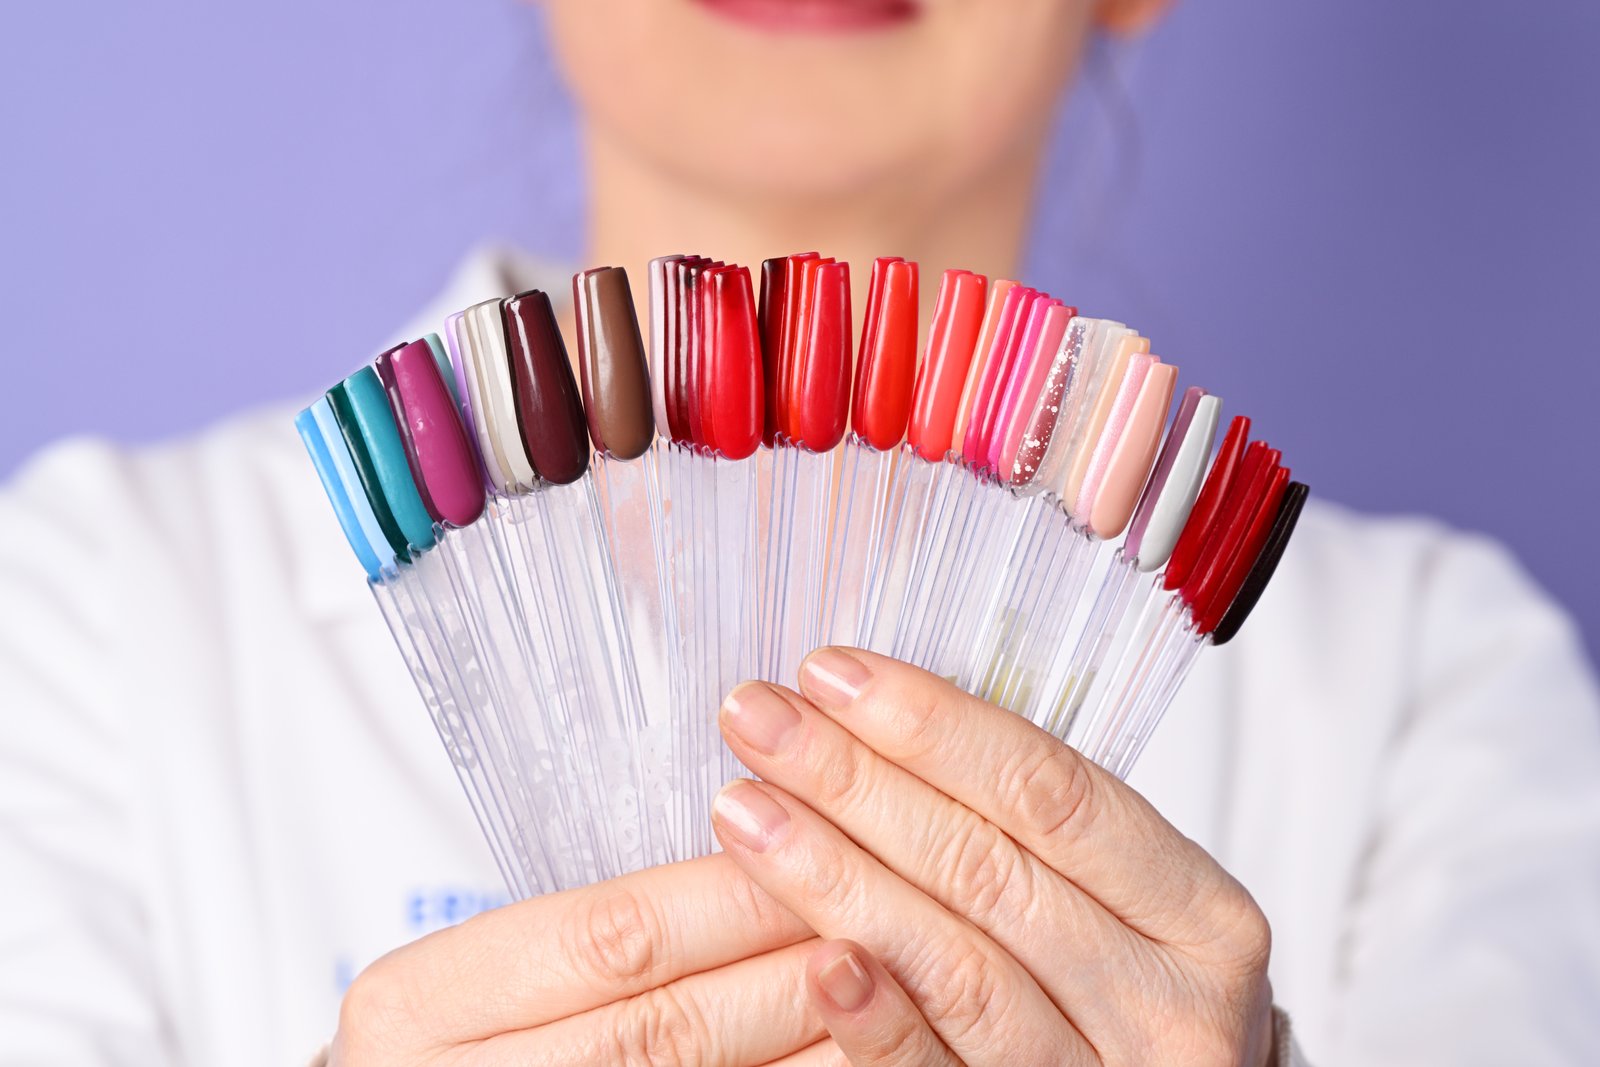
Versatility From classic French tips to intricate nail art, acrylics provide the perfect canvas for any design. You can paint them, embed decorations, or leave them natural.
Cost-Effective Compared to many gel systems, acrylic supplies are generally more affordable, making them accessible for beginners learning at home.
Air-Dry Convenience Unlike gel nails that require UV or LED lamps, acrylic nails air-dry naturally. This eliminates the need for expensive equipment when you’re just starting out.
Essential Supplies You’ll Need
Before you begin your acrylic nail journey, gather these essential supplies. Investing in quality products from the start makes learning much easier and produces better results.
Core Supplies (Must-Have)
1. Acrylic Powder
Start with professional-grade acrylic powder. For beginners, clear or pink powder is most versatile.
Clear Powder: Transparent, works for any design, most forgiving for beginners Pink Powder: Creates natural nail bed color, classic look White Powder: Used for French tips and bright designs
Recommended Brands:
- Wapizima Professional Acrylic Powder – Smooth application, excellent for beginners
- Fantasty Acrylic Powder Collection – Great workability and consistency
Look for powders that offer good working time (don’t dry too fast) and smooth self-leveling properties.
2. Acrylic Liquid (Monomer)
This liquid component activates the powder. Choose a professional-grade monomer for best results.
Types:
- Standard Monomer: Traditional formula with characteristic smell
- Low-Odor Monomer: Reduced smell, great for home use
- Non-MMA Monomer: Safer formula (avoid MMA products)
What to Look For:
- Professional-grade quality
- Moderate evaporation rate (not too fast)
- Good color stability (won’t yellow)
Pro Tip: Low-odor formulas are perfect for beginners working at home without professional ventilation.
3. Acrylic Brush
A quality brush is crucial for acrylic application. The right brush holds liquid properly and allows precise control.
Size Recommendations:
- Size 8: Good all-around size for beginners
- Size 10: Slightly larger, holds more product
- Size 6: Smaller, good for detail work
Brush Types:
- Kolinsky Sable: Professional gold standard, excellent liquid retention
- Synthetic: More affordable, decent for learning
- Crimped Ferrule: Helps maintain brush shape
Investment Advice: Start with a mid-range brush ($10-20). As you improve, invest in a premium Kolinsky brush ($30-50).
4. Nail Tips or Forms
Choose between nail tips or forms for building length.
Nail Tips (Easier for Beginners):
- Pre-shaped plastic extensions
- Glued to natural nail free edge
- Various shapes: natural, square, coffin, stiletto
- Easy to apply and shape
- Perfect for learning
Nail Forms (More Advanced):
- Disposable paper or reusable forms
- Placed under natural nail for sculpting
- Requires more skill and practice
- No seam to blend (more natural result)
- Better for very short nails
Acrylic nails for beginners: Start with nail tips. They’re more forgiving and help you focus on learning the acrylic application rather than form placement.
5. Nail Prep Supplies
Proper preparation is crucial for long-lasting acrylics.
Nail Files:
- 180 grit for natural nails
- 100-150 grit for shaping acrylics
- 240 grit for final smoothing
Buffer Block: Fine grit for smoothing and shining
Cuticle Pusher: Metal or wooden orange stick
Nail Dehydrator or Rubbing Alcohol: Removes oils and moisture
Primer: Creates chemical bond between natural nail and acrylic
- Acid-Free Primer: Safer for beginners, gentler on nails
- Acid-Based Primer: Stronger bond but requires careful application
Nail Glue: For attaching tips (if using tips)
6. Finishing Supplies
Nail File for Shaping: 100-150 grit for shaping finished acrylics
Buffer: For smoothing surface before polish
Cuticle Oil: Essential for aftercare and nail health
Top Coat: Optional if leaving nails natural or adding polish
Additional Helpful Supplies
Dappen Dish Small glass container for monomer. Glass is essential as plastic can melt or react with monomer.
Lint-Free Wipes or Paper Towels For cleaning brush and wiping nails
Dust Brush Removes filing dust between steps
Nail Brush Cleaner Acrylic brush cleaner or pure acetone for cleaning brushes
Electric Nail File (Optional) For experienced users only – can damage nails if used incorrectly by beginners
Complete Beginner Kit Recommendation
Instead of buying supplies individually, consider a complete starter kit that includes everything you need:
Professional Acrylic Nail Kit for Beginners
- Acrylic powder (clear or pink)
- Professional monomer
- Quality acrylic brush
- 100 nail tips (multiple sizes)
- Nail glue
- Primer
- Files and buffer
- Cuticle pusher
- Instructions
Budget: $50-100 for quality beginner kit Advantage: Everything works together, nothing missing
Preparing Your Natural Nails (Critical Foundation)
Proper nail preparation is absolutely crucial for long-lasting acrylic nails. This step is 50% of your success. Rush through prep, and your acrylics will lift within days.
Why Nail Prep Matters
Think of nail prep like preparing a surface before painting. If you paint over dirt, the paint peels. If you apply acrylics over oils and moisture, they lift. Clean, properly prepared nails ensure maximum adhesion and longevity.
Step-by-Step Nail Preparation
Step 1: Remove All Old Polish
Use acetone-based nail polish remover to eliminate every trace of polish, gel, or previous enhancements.
Why: Any residue creates a barrier preventing proper adhesion.
How:
- Soak cotton pad in acetone
- Press onto nail for 10-15 seconds
- Wipe away all color
- Check edges and cuticle areas
- Repeat if necessary
Step 2: Shape Natural Nails
File your natural nails to your desired length. For beginners, shorter is better.
Best Beginner Length: Leave 2-3mm of free edge
Why Short Nails for Learning:
- Easier to work with
- Less likely to break during learning
- Builds confidence before attempting longer nails
Filing Technique:
- File in one direction only (not back-and-forth sawing)
- Hold file at 45-degree angle
- Prevents splitting and damage
- Creates smooth edge
Step 3: Push Back Cuticles
Gently push back cuticles using a cuticle pusher. This exposes the entire nail plate for product application.
Important Rules:
- Be gentle – never force
- Push back, don’t cut living tissue
- Only remove dead cuticle tissue
- Avoid breaking skin (entry point for infection)
Technique:
- Start at one side of cuticle
- Gently push back in small movements
- Work across to other side
- Use circular motions for stubborn areas
Step 4: Buff the Nail Surface
Using a fine buffer, gently buff the entire nail surface to remove the natural shine.
Purpose: Creates microscopic texture for better adhesion
How to Buff Properly:
- Use light pressure
- Buff entire nail surface
- Focus on removing shine, not nail layers
- Don’t over-buff or you’ll thin the nail plate
Warning Signs of Over-Buffing:
- Nails feel hot while buffing
- Nails look extremely white or chalky
- Nails feel painful or sensitive
Correct Result: Nails should look matte but not damaged
Step 5: Clean Thoroughly
Remove all dust and debris from nail surface and surrounding skin.
Method:
- Use clean dust brush
- Brush away all filing dust
- Clean under free edge
- Wipe around cuticle area
Why: Even tiny particles of dust can cause lifting
Step 6: Apply Dehydrator
Apply nail dehydrator or rubbing alcohol (99% isopropyl) to remove all oils and moisture from the nail plate.
Application:
- Apply to nail plate only (avoid skin)
- Let air dry completely (do not blow or fan)
- Nail should look completely dry and chalky
- Wait 30-60 seconds
Purpose: Removes natural oils that prevent adhesion
Step 7: Apply Primer
Apply a thin layer of acid-free primer to the natural nail only.
Critical Rules:
- Apply ONLY to natural nail
- Avoid cuticle and skin contact completely
- Use minimal product (thin coat)
- Let dry until chalky white
- Never touch skin with primer
Drying: Primer should dry to a chalky white appearance in 30-60 seconds
Why It’s Important: Primer creates a chemical bond between your natural nail and the acrylic, dramatically improving adhesion.
Step 8: Apply Nail Tips (If Using)
If using tips to add length, apply them after primer dries.
Tip Application:
- Select proper size tip for each nail (should fit sidewall to sidewall)
- Apply small drop of glue to tip’s well (curved part)
- Position tip at 45-degree angle to natural nail
- Press down and lay flat in one smooth motion
- Hold firmly for 5-10 seconds
- No air bubbles should be visible
After Glue Dries:
- Clip tips to desired length (leave extra – you can file shorter later)
- File the seam where tip meets natural nail until smooth
- Shape free edge to desired shape
- Blend the seam completely so it’s invisible
Pro Tip: When filing the seam, hold file parallel to nail and use long strokes to create seamless blend.
Step-by-Step Acrylic Application Process
Now for the exciting part – applying acrylics! Take your time with each step. Speed comes with practice; focus on technique first.
Setting Up Your Workspace
Before you begin, proper setup is essential.
Workspace Requirements:
- Clean, flat surface
- Good lighting (natural light or bright white light)
- Proper ventilation (open window or fan)
- Comfortable seating
- All supplies within easy reach
Product Preparation:
- Pour monomer into dappen dish (fill only ¼ full)
- Open acrylic powder container
- Lay out all tools
- Have paper towels ready
- Ensure good lighting
Safety:
- Work in ventilated area
- Keep monomer away from heat/flames
- Avoid skin contact with products
- Keep products away from children/pets
Creating the Perfect Bead
The foundation of good acrylic application is creating the right bead consistency.
The Bead Consistency Guide:
Too Wet (Runny):
- Bead spreads uncontrollably
- Hard to shape
- Results in thin, weak nails
- Looks watery and shiny
Too Dry (Crumbly):
- Bead breaks apart
- Won’t smooth
- Leaves bumpy application
- Looks chalky and uneven
Perfect (Medium-Wet):
- Bead holds shape
- Spreads when pressed
- Smooth and controllable
- Slightly glossy appearance
The Three-Bead Technique for Beginners
Most beginners find success with the three-bead method: one bead for free edge, one for center, one for cuticle area.
Bead 1: Free Edge/Tip Area
Step 1: Create Your First Bead
- Dip brush into monomer until fully saturated
- Wipe one side of brush on dappen dish rim
- Dip moist brush tip into acrylic powder
- A bead will form automatically on brush tip
- Bead should be smooth and hold together
Step 2: Apply to Free Edge
- Place bead on tip area of nail
- Use belly of brush (not tip) to press and spread
- Guide bead toward free edge
- Press gently to flatten and spread
- Pat and press – don’t brush back and forth
Technique Tips:
- Work quickly but not frantically
- Smooth motion is key
- Bead should flow smoothly
What You’re Creating:
- Coverage over tip or free edge
- Smooth, even layer
- No gaps or holes
Bead 2: Center Zone (Building the Apex)
Step 1: Create Second Bead
- Same process as before
- This bead can be slightly larger
- Medium-wet consistency
Step 2: Place in Center
- Position bead in center of nail plate
- This is where you’ll build your apex (highest point)
- Press and guide toward first bead
- Blend seamlessly into tip area
- Build thickness in center
The Apex Explained:
The apex is the highest point of the nail, located in the center of the nail plate. It provides structural strength and creates the natural curve.
Why It Matters:
- Provides strength to prevent breaking
- Creates natural nail curve
- Distributes stress evenly
- Prevents flat, weak nails
How to Build It:
- Center of nail should be highest
- Gradually thins toward cuticle and free edge
- Gentle curve, not sharp peak
Bead 3: Cuticle Area
Step 1: Create Smaller, Wetter Bead
- Smaller bead than previous two
- Slightly wetter consistency (more monomer)
- Flows more easily near cuticles
Step 2: Apply Near Cuticle
- Place bead 1-2mm away from cuticle (never touch skin)
- Gently press toward cuticle
- Allow bead to flow close but not touching
- Blend into center section
- Keep this area thinner than center
Critical Rule: Leave a Gap
Always leave a small gap (1-2mm) between acrylic and cuticle.
Why:
- Prevents lifting
- Allows for natural nail growth
- Prevents skin irritation
- Looks more natural
Common Beginner Mistake: Applying acrylic too close to or touching the cuticle. This causes immediate lifting and potential skin reactions.
Blending and Smoothing
As you apply each bead, use your brush to smooth and blend.
Brush Technique:
- Use brush belly (widest part) for smoothing
- Pat and press rather than brushing
- Use flat side of brush for large areas
- Use tip of brush for detail work
- Work while acrylic is still slightly wet
Check Your Work:
- View nail from all angles
- Side view should show nice apex curve
- Top view should look smooth
- No obvious bead lines
- Gradual thickness transition
Curing Time
Acrylics cure through an exothermic reaction (produces heat).
What to Expect:
- Warmth on nails as product cures
- Temperature increase is normal
- Should not be painful (if it is, too much product)
- Curing takes 2-3 minutes
Testing for Complete Cure:
- Wait 2-3 minutes after application
- Tap nail surface with tool handle
- Should sound solid and hard
- If it sounds dull or you feel give, wait longer
Don’t Rush: Filing uncured acrylic causes crumbling and weakness
Repeat on All Nails
Complete one hand before starting the other.
Best Practice:
- Apply all nails on one hand
- Let that hand fully cure (2-3 min per nail)
- Start second hand
- By then, first hand is ready for filing
Take Breaks: Your first set may take 60-90 minutes. That’s normal!
Shaping and Finishing Your Acrylic Nails
Once acrylics are fully cured and hard, it’s time to shape and refine them to perfection.
Filing the Length
Step 1: File to Desired Length
- Use 100-150 grit file
- File straight across free edge
- Take off excess length gradually
- Better to leave too long than cut too short
Filing Direction: One direction only, not sawing back and forth
Shaping the Free Edge
Choose your desired nail shape and file accordingly.
Popular Nail Shapes:
Square:
- File straight across
- Slightly round corners (softened square)
- Modern, clean look
Round:
- File corners in soft curve
- Follows natural nail shape
- Classic, feminine
Oval:
- File sides at an angle toward center
- Create egg shape
- Elongates fingers
Almond:
- File sides to taper toward center
- Round the point slightly
- Elegant, trendy
Coffin/Ballerina:
- File sides straight to create taper
- File tip straight across
- Creates coffin shape
- Requires some length
Stiletto:
- File sides to dramatic point
- Very advanced (not for first attempt)
Beginner Recommendation: Start with round or softened square. They’re most forgiving and practical.
Refining the Surface
Step 1: Check the Apex View nails from the side. The apex (highest point) should be in the center, with gradual slopes toward cuticle and free edge.
If Apex Needs Adjustment:
- File down high areas
- Be gentle – remove small amounts
- Check frequently
- Don’t over-file or you’ll thin the nail
Step 2: Smooth the Surface
- Use 100-150 grit file for major smoothing
- File any bumps or uneven areas
- Work in long strokes down the nail
- Blend cuticle area seamlessly
- Remove any visible bead lines
Technique:
- Hold file fairly flat against nail
- Use light to medium pressure
- Long, smooth strokes
- Check frequently
Step 3: Buff to Smoothness
- Use 180-240 grit buffer
- Buff entire nail surface
- Creates smooth, glass-like surface
- Removes file marks
- Prepares for polish or leaving natural
Don’t Over-Buff: Just enough to create smooth surface
Final Steps
Step 1: Remove All Dust
- Use clean dust brush
- Brush entire nail
- Clean cuticle area
- Brush surrounding skin
- Ensure no dust remains
Step 2: Clean Under Free Edge
- Check for trapped dust or debris
- Clean with brush or orange stick
Step 3: Apply Cuticle Oil
- Massage cuticle oil into skin around each nail
- Rehydrates after filing
- Promotes nail health
- Makes nails look professionally done
Step 4: Optional – Polish or Leave Natural
Leave Natural:
- Buff to high shine
- Apply clear top coat
- Natural, glossy look
Apply Polish:
- Regular nail polish works great
- Gel polish for longer wear (requires lamp)
- Nail art possibilities are endless
Common Mistakes Beginners Make (And How to Avoid Them)
Learning from common errors saves time and frustration. Here are the mistakes almost every beginner makes – and how to prevent them.
1. Skipping or Rushing Nail Preparation
The Mistake: Rushing through prep steps, skipping dehydrator or primer, not cleaning nails properly.
The Result: Lifting, separation within days, complete failure of application.
The Fix:
- Never skip prep steps
- Take time with each preparation step
- Use quality dehydrator and primer
- Wait for proper drying times
- Think of prep as your foundation
Time Investment: Spend 5-10 minutes per hand on prep. It’s worth it.
2. Using Too Much Monomer (Wet Beads)
The Mistake: Creating beads that are too wet and runny.
The Result:
- Thin, weak nails
- Acrylic spreads everywhere
- Flooding cuticles
- Long drying time
- Nails break easily
The Fix:
- Wipe excess monomer from brush before picking up powder
- Aim for medium-wet consistency
- Practice bead consistency on practice tips first
- Remember: you can always add more monomer, but can’t remove it from bead
3. Using Too Little Monomer (Dry Beads)
The Mistake: Not enough liquid in the bead, creating crumbly, dry product.
The Result:
- Lumpy, bumpy application
- Impossible to smooth
- Weak structure with air gaps
- Difficult to work with
The Fix:
- Ensure brush is properly saturated
- Don’t wipe off too much monomer
- Fresh, quality products work better
- Practice makes perfect on consistency
4. Touching the Cuticle with Acrylic
The Mistake: Applying product too close to or touching the cuticle and skin.
The Result:
- Immediate lifting
- Skin irritation
- Potential allergic reaction
- Pain and discomfort
- Infection risk
The Fix:
- Always leave 1-2mm gap from cuticle
- Let product flow close but never touch
- If you touch skin, immediately remove with brush
- Take your time near cuticle area
Remember: You can always file down close to cuticles later if needed, but you can’t undo touching skin.
5. Not Building a Proper Apex
The Mistake: Applying acrylic flat without creating a center apex.
The Result:
- Weak nails that crack easily
- Flat, unnatural appearance
- No structural strength
- Easy breakage
The Fix:
- Build thickness in center of nail
- Create gentle curve from cuticle to free edge
- Think of a bridge – strongest in the middle
- View from side angle to check apex
6. Applying Too Much Product (Thick Nails)
The Mistake: Using too much acrylic, creating bulky, thick nails.
The Result:
- Unnatural, chunky appearance
- Heavy feel
- Hard to file and shape
- Looks amateur
The Fix:
- Less is more
- Build thin layers
- Apex should be thickest part, not entire nail
- Thin at cuticle and free edge
- Practice makes you use less product naturally
7. Filing Before Complete Cure
The Mistake: Starting to file before acrylic is fully hard.
The Result:
- Product crumbles
- Weakness in structure
- Damage to application
- Have to start over
The Fix:
- Wait full 2-3 minutes
- Tap test – should sound solid
- Be patient
- Use waiting time to prep other nails
8. Over-Buffing Natural Nails During Prep
The Mistake: Buffing too aggressively, removing layers of natural nail.
The Result:
- Thin, damaged natural nails
- Pain and sensitivity
- Longer recovery time
- Natural nail damage
The Fix:
- Gentle buffing – just remove shine
- Don’t buff until white or hot
- If it hurts, stop immediately
- You’re removing shine, not nail layers
9. Ignoring Brush Care
The Mistake: Not cleaning brush properly, letting product build up.
The Result:
- Brush becomes stiff and unusable
- Can’t create smooth beads
- Expensive brush ruined
- Poor application quality
The Fix:
- Clean brush after each use
- Use brush cleaner or pure acetone
- Wipe on paper towel between beads
- Store in brush case or lying flat
- Never leave standing in monomer
Brush Cleaning:
- Wipe excess product on paper towel
- Dip in brush cleaner
- Wipe until clean
- Shape bristles to point
- Let dry completely
10. Unrealistic Expectations for First Attempt
The Mistake: Expecting perfect salon nails on first try.
The Result:
- Frustration
- Giving up too soon
- Discouragement
The Reality:
- First set won’t be perfect – that’s normal
- Every professional started as a beginner
- Each set you do improves your skills
- Practice is the only path to perfection
The Fix:
- Set realistic expectations
- Celebrate small improvements
- Practice on yourself or willing friends
- Watch tutorials multiple times
- Join online communities for support
Maintenance and Aftercare
Proper maintenance extends the life of your acrylic nails and keeps them looking salon-fresh.
Daily Care Tips
Protect Your Investment:
Wear Gloves:
- When cleaning with chemicals
- Washing dishes
- Doing laundry
- Gardening or yard work
Why: Prolonged water exposure and chemicals cause lifting and damage.
Apply Cuticle Oil Daily:
- Morning and night
- Massage into cuticle area
- Prevents dryness
- Reduces lifting
Avoid Using Nails as Tools:
- No picking
- No prying
- No scratching
- No opening cans or packages
Why: This causes stress on acrylics, leading to lifting or breaking.
Keep Nails Dry:
- Pat hands dry after washing
- Don’t soak in baths for extended periods
- Remove rings before hand washing
Fill Schedule
Acrylic nails need fills (maintenance) as your natural nails grow.
Timing: Every 2-3 weeks
Signs You Need a Fill:
- Visible gap at cuticle (more than 3mm)
- Growth line is obvious
- Lifting at cuticle area
- Nail feels loose or unbalanced
What Happens During a Fill:
- Lift area is filed down
- New acrylic is applied to regrowth area
- Nails are reshaped and smoothed
- Results in like-new appearance
At-Home Fill: If you learned application, you can do your own fills using the same technique as original application.
When to Remove and Start Fresh
Remove Completely If:
- Significant lifting occurs
- Damage or cracks appear
- You’ve had multiple fills (after 6-9 weeks total wear)
- Natural nail growth is excessive
- You want to change length or shape
Safe Removal
Never pick or pull off acrylic nails! This causes severe damage to natural nails.
Proper Removal Method:
- File off shiny top layer with coarse file
- Soak nails in acetone for 20-30 minutes
- Use foil wrap method or bowl soaking
- Gently push off softened acrylic with cuticle pusher
- Do NOT force – soak longer if needed
- Buff natural nails gently
- Apply cuticle oil and nail strengthener
Learning Timeline: What to Expect
Be patient with yourself! Learning acrylic nails is a skill that improves dramatically with practice.
Typical Learning Progression
First Set (Your First Attempt):
- Time: 60-90 minutes per hand
- Quality: Expect imperfection
- Common Issues: Bumpy surface, uneven thickness, visible bead lines
- Reality Check: Will not look professional – and that’s okay!
Second & Third Sets:
- Time: 45-60 minutes per hand
- Quality: Noticeable improvement
- Progress: Better bead consistency, smoother application
- Tip: Take photos to see improvement
Sets 4-7:
- Time: 35-50 minutes per hand
- Quality: Decent results, acceptable for personal wear
- Progress: More consistent technique, better apex building
Sets 8-10:
- Time: 25-40 minutes per hand
- Quality: Good results, can do friends’ nails
- Progress: Confident with process, consistent quality
After 15-20 Sets:
- Time: 20-30 minutes per hand
- Quality: Professional-looking results
- Progress: Smooth, efficient technique
Professional Level:
- Time: 15-20 minutes per hand
- Quality: Salon quality consistently
- Progress: Could work professionally
Accelerating Your Learning
Practice Regularly:
- Do your own nails every 2-3 weeks
- Practice on friends or family
- Use practice nail tips (cheap and reusable)
Watch Multiple Tutorials:
- Different instructors, different techniques
- Pause and rewatch difficult sections
- Take notes on tips and tricks
Join Communities:
- Online nail tech groups
- Facebook communities
- Instagram nail artists
- Ask questions and share progress
Consider Professional Training:
- Local beauty schools offer classes
- Online courses with feedback
- One-on-one mentorship
- Faster learning with expert guidance
Don’t Get Discouraged
Remember:
- Every expert was once a beginner
- Each set improves your skills
- Mistakes teach valuable lessons
- Progress isn’t always linear
- Patience and practice win
Celebrate Your Progress: Take before and after photos to see how far you’ve come!

Add Comment